The Best Deviled Eggs Recipe: Creamy, Crowd-Pleasing & Ready in 20 Minutes
I brought deviled eggs to a potluck once and forgot to peel them before leaving the house. That disaster is exactly why I perfected a foolproof method I’ve used ever since.
No rubbery whites, no gray yolks, no filling that slides right off. Just perfectly creamy, tangy deviled eggs that turn out right every single time, whether it’s a Tuesday snack or a holiday spread.
I’ve made this recipe more times than I can count, for family gatherings, meal prep, and yes, even that chaotic parking lot situation. It works. Every time.
Let’s get into it.
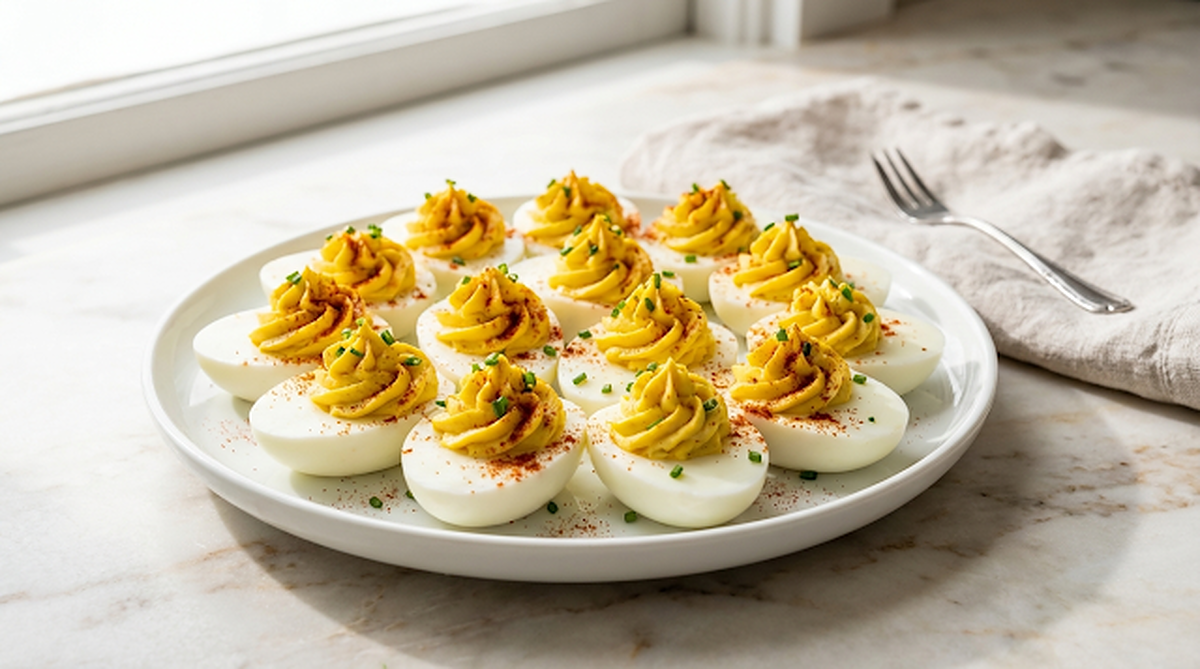
These deviled eggs are ready in 20 minutes and stay foolproof — an ice bath stops the cooking to prevent gray yolks, and each half brings 3–4g of protein at about 70 calories.
Why This Deviled Eggs Recipe Works
- High-protein healthy snack, each deviled egg half delivers 3–4g of protein at just 70 calories. Serious power-to-portion ratio
- Ready in 20 minutes flat, once your eggs are boiled, this is genuinely a 5-minute recipe. No fancy equipment needed
- Easy meal prep hero, boil and peel up to 3 days ahead, fill the day of. Party prep has never been smoother
- No gray yolks, ever, the ice bath method stops cooking immediately and locks in that bright, golden yolk every time
- Naturally gluten-free and low-carb, a weight loss-friendly snack that actually satisfies
Deviled Eggs
Ingredients
Method
- Place eggs in a single layer in a saucepan. Cover with cold water by 1 inch.
- Bring to a full rolling boil over medium-high heat, about 8–10 minutes.
- The moment it boils, cover the pan and remove from heat.
- Set a timer for exactly 10 minutes. Don’t guess, time it.
- Fill a large bowl with ice water while the eggs rest.
- After 10 minutes, transfer eggs immediately to the ice bath.
- Let them sit for at least 5 minutes, this stops the cooking and makes peeling dramatically easier.
- Don’t over-boil, once the water reaches a full rolling boil, removing from heat and resting for exactly 10 minutes is the sweet spot between fully cooked and still bright golden.
- Peel under cold running water, starting at the wide end. There’s a small air pocket there that gives you a natural entry point.
- Slice each peeled egg in half lengthwise. Pop the yolks into a medium bowl; arrange the whites on a serving plate.
- Mash the yolks with a fork until completely crumbly, no large chunks.
- Add mayonnaise, mustard, vinegar, salt, pepper, and garlic powder.
- Mix until completely smooth and creamy. Taste it. Adjust salt or vinegar to your preference.
- Filling too thick? Add ½ tsp more mayo. Too loose? Add one extra yolk.
- Spoon or pipe the filling into each egg white half, mounding it slightly above the rim.
- Dust generously with smoked paprika and top with fresh chives if using.
Notes
- Older eggs peel easier: Eggs bought a week or more earlier peel more cleanly than very fresh ones.
- Smooth filling: Push the yolks through a fine sieve for a silky, lump-free filling.
- Make ahead: Store the whites and filling separately, covered, for up to 2 days. Fill just before serving.
- Food safety: Don’t leave deviled eggs out more than 2 hours (1 hour above 90°F). Set the platter over ice for outdoor events.
| Goal | Do This | Common Mistake |
|---|---|---|
| No gray yolks | Ice bath right after boiling | Eggs left sitting in hot water |
| Creamy filling | Mash the yolks smooth | Lumpy filling that slides off |
| No rubbery whites | Stop the cooking with the ice bath | Overcooking |
| Make ahead | Boil up to 3 days ahead, fill day-of | Filling too early |
Deviled Egg Tips
- I personally found smoked paprika is far superior to sweet paprika, it adds a subtle depth that makes people ask “what’s in these?” every single time. Sweet paprika is just color. Smoked paprika is flavor.
- Use a piping bag for a polished look, a star tip takes 2 extra minutes and makes a huge visual difference. A spoon works too. It won’t look like a catering photo, but the flavor is incredible, and that’s what actually matters.
- Season more than you think, egg yolk is rich and needs both salt and acid to shine. Don’t be shy with the vinegar.
- Storage: Filled deviled eggs keep for up to 2 days refrigerated in a single layer in an airtight container. After 2 days, the whites soften and the filling loses its creaminess.
Nutrition Fact
Here’s something most people don’t realize: egg yolks contain choline, a nutrient critical for brain health, liver function, and fetal development that most people don’t get enough of. One whole egg delivers about 147mg of choline, almost entirely in the yolk. Eggs were long blamed for raising cholesterol, but current nutritional research shows that for most healthy adults, dietary cholesterol from whole eggs has little effect on blood cholesterol levels. The American Heart Association now includes eggs as part of a healthy diet. As a high-protein snack at just 70 calories per half, deviled eggs are one of the most nutrient-dense quick healthy meal options you can put on the table.
Made This Recipe?
I’d love to hear how they turned out! Drop a comment below, did you stick with the classic filling, or did you try one of the swaps?
Leave a star rating while you’re here, it takes 5 seconds and helps other home cooks find this recipe.
Share your creation on TikTok and tag @FlavorFlip, we repost our favorites every week.