Fluffy Buttermilk Pancakes (Tall, Light and Easy)
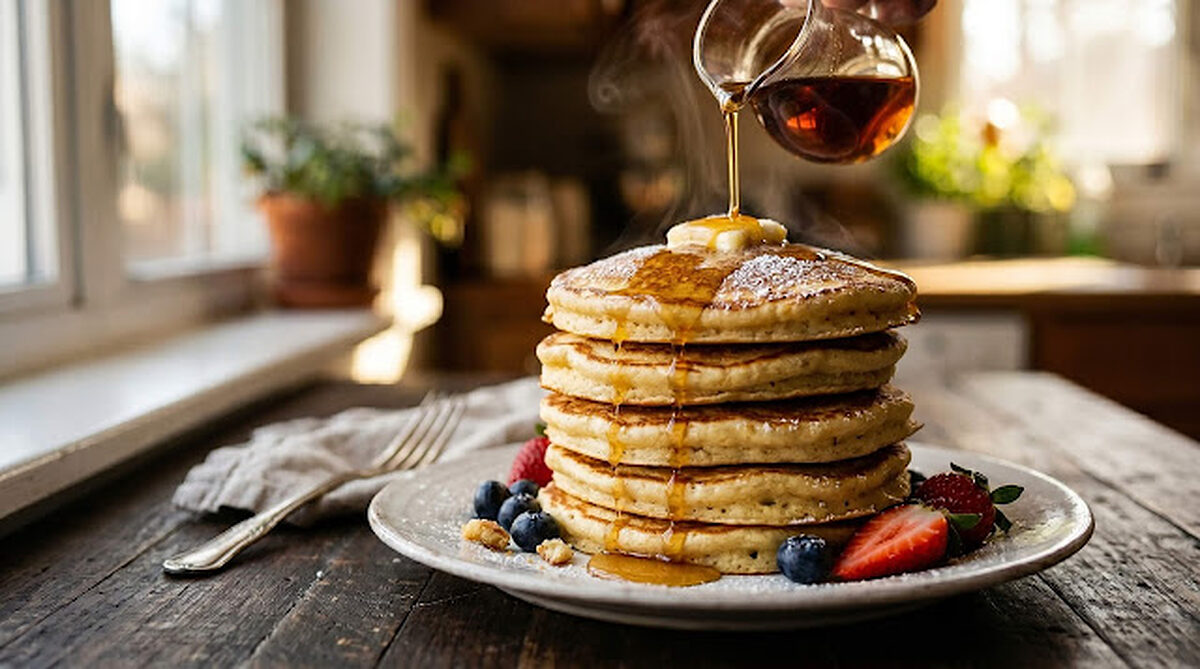
I’ve made pancakes every weekend for three years. Flat ones, rubbery ones, ones that looked perfect and tasted like cardboard. Then I figured out the three things that actually matter, and now I make the kind of stack that makes people think I went to culinary school.
The thing is, pancake recipes have exactly three rules you can’t break. Nail them and every batch comes out fluffy, golden, and worth waking up for. Miss them and you’re eating hockey pucks with syrup.
Perfect fluffy pancakes need room temperature ingredients, a well-rested batter, and a properly preheated pan. That’s it. Three ingredients you already have, one bowl, ready in 15 minutes.
So let’s fix your pancake game for good.
Flour, Buttermilk and Browned Butter
All-purpose flour over cake flour: Cake flour produces pancakes so delicate they fall apart when you try to flip them. All-purpose flour has just enough gluten structure to hold the pancake together while staying tender inside. Bread flour is too tough, the gluten overdevelops and you get chewy instead of fluffy.
Buttermilk over regular milk: This is the single biggest upgrade you can make. Buttermilk is acidic, it reacts with baking soda to create carbon dioxide bubbles that make pancakes rise dramatically higher than regular milk ever could. No buttermilk? Add 1 tbsp white vinegar to 1 cup regular milk, stir, and wait 5 minutes. Same reaction. Same result.
Baking powder AND baking soda: Most recipes use one or the other. Use both. Baking powder provides the initial lift when batter hits the pan. Baking soda reacts with the buttermilk acid for additional rise and that deep golden-brown color. Together they give you height and color that neither achieves alone.
Eggs, separated: Most pancake recipes throw whole eggs straight in. Separate them. Whip the whites to soft peaks, fold in at the end. Those whipped egg whites are tiny air pockets that create the lightest, most cloud-like texture you’ve ever had in a pancake. Is it one extra step? Yes. Is it worth it? Completely.
Melted butter over oil: Butter adds flavor that neutral oil simply doesn’t have. Brown the butter slightly before adding, it takes 90 extra seconds and gives a nutty, almost toffee-like depth to every bite. I personally never go back to plain melted butter once I tried browning it.
Secret weapon, a tablespoon of sour cream: Stir one tablespoon into the batter. The extra fat and tang from the sour cream creates a richer, more tender crumb and adds a subtle complexity that makes people ask what you did differently. Nobody ever guesses sour cream. Tell them or don’t, your call.
Fluffy Buttermilk Pancakes
Ingredients
Method
- Brown the butter in a small saucepan over medium heat, stir constantly until it turns golden and smells nutty, about 90 seconds past fully melted. Pour into a bowl immediately to stop cooking.
- Whisk flour, baking powder, baking soda, sugar, and salt in a large bowl. Make a well in the center.
- In a separate bowl, whisk buttermilk, egg yolks, browned butter, sour cream, and vanilla until combined.
- In a third bowl, whip egg whites with a hand mixer or whisk until soft peaks form, they should hold a gentle curve but not be stiff.
- Pour wet ingredients into the flour well. Fold 8–10 times only, batter should still be lumpy. Stop before you think you should.
- Gently fold in whipped egg whites in two additions, use a light hand, you’re preserving air bubbles not mixing them out.
- Rest the batter for 5 minutes, this lets the baking powder activate and the gluten relax. Don’t skip this.
- Heat a cast iron skillet or non-stick pan over medium heat. Brush lightly with butter.
- Pour ¼ cup batter per pancake. Don’t spread it, let it settle naturally.
- Cook until bubbles form across the surface and edges look set, about 2–3 minutes. Flip once only.
- Cook second side 1–2 minutes until golden. Never press down with the spatula, you’re deflating every air bubble you just worked to create.
- Serve immediately or keep warm in a 200°F oven on a wire rack, never stack on a plate or the steam makes them soggy.
Notes
- No buttermilk: Stir 1 tbsp lemon juice into 1 cup milk and let it stand 5 minutes.
- Skip the whipped whites: Adding the eggs whole works too. The pancakes will be slightly less tall.
- Pan temperature: Cook a small test pancake first. If it browns before bubbles form, lower the heat.
- Freezer: Freeze cooled pancakes in a single layer, then bag. Reheat in the toaster or at 350°F.
| Factor | Fluffy Pancakes | Flat / Rubbery Pancakes |
|---|---|---|
| Ingredients | Room temperature | Cold from the fridge |
| Batter | Rested | Used immediately or overmixed |
| Pan | Properly preheated | Too cool or too hot |
| Flour | All-purpose | Cake (falls apart) or bread (chewy) |
Flip Once
- Never flip twice. One flip, one time. Every additional flip compresses the pancake and undoes the fluffiness you built in the batter. Flip once, leave it alone.
- I personally found that the second and third pancakes are always better than the first. The first one seasons the pan and calibrates the temperature. Don’t judge your batter by the first pancake, it’s a sacrifice. Every cook knows this.
- Use a ¼ cup measure for consistent sizing. Consistently sized pancakes cook at the same rate, no underdone centers while edges burn. Eyeballing leads to chaos.
- Add mix-ins directly to the poured batter in the pan, not the bowl. Blueberries mixed into the bowl sink to the bottom and bleed purple into the entire batter. Drop them onto the wet batter surface after pouring, they stay distributed and don’t stain everything.
- The batter thickens as it sits. If you’re making a large batch, add a splash of buttermilk after the first few pancakes to keep it pourable.
What Resting the Batter Does
Why resting the batter matters: Two things happen during the 5-minute rest. First, baking powder starts producing CO2 bubbles that get trapped in the batter structure, these expand dramatically when heat hits the pan. Second, the gluten strands that formed during mixing start to relax, which means less toughness and more tenderness in the finished pancake. Skip the rest and you get flatter, slightly tougher pancakes. Five minutes costs nothing.
Pan tip: Cast iron is the gold standard for pancakes, it holds heat evenly and produces the most consistent golden-brown color across the whole surface. Non-stick works well but creates slightly less color. Whatever you use, hone the temperature between pancakes by removing from heat for 20 seconds if it’s getting too hot, a pan that’s too hot at the start burns the first side before the center sets.
Flat, Dense or Burnt Pancakes
“They came out flat and dense” → Overmixed batter, or baking powder is old → Mix until just combined, lumps are correct. And check your baking powder: drop a teaspoon into hot water. If it doesn’t bubble aggressively, it’s dead. Replace it.
“The outside burned before the inside cooked” → Pan was too hot → Medium heat only. Let the pan preheat for 2 minutes, then test with a water droplet. If it evaporates violently, turn it down and wait 30 seconds before pouring.
“They stuck to the pan and tore when I tried to flip” → Flipped too early, or pan wasn’t properly buttered → Wait for bubbles across the entire surface and matte edges before flipping. And butter the pan between every batch, not just the first.
“They tasted bland even though I followed the recipe” → Underseasoned, or skipped the vanilla and brown butter → Salt and vanilla are not optional, they’re the flavor backbone. And brown that butter. The difference between melted butter and browned butter in pancakes is not subtle.
Pancake Recipe Variations for Every Lifestyle
Classic Fluffy Buttermilk (the base recipe above), the one that fixes every pancake problem you’ve ever had.
High Protein Pancakes:
- Replace ½ cup flour with vanilla protein powder
- Add ½ cup Greek yogurt to the wet ingredients
- Hits 15–18g protein per serving, same fluffy texture, actual macro value
Banana Oat Pancakes (gluten-free friendly):
- Replace flour with 1 cup rolled oats blended into flour + ½ cup almond flour
- Mash 1 ripe banana into the wet ingredients
- Naturally sweet, no sugar needed, higher fiber than classic version
Blueberry Lemon Ricotta:
- Add ½ cup ricotta to wet ingredients for extra richness
- Stir zest of 1 lemon into batter
- Drop fresh blueberries onto wet batter surface after pouring
- The ricotta creates a creamy interior texture that’s genuinely different from any other pancake
Chocolate Chip Brown Butter:
- Use the base recipe, double the brown butter
- Drop dark chocolate chips onto poured batter in the pan
- Finish with flaky sea salt, same move as the yogurt clusters, same result
Vegan Banana Pancakes:
- Replace eggs with 2 flax eggs (1 tbsp ground flax + 3 tbsp water each, rest 5 minutes)
- Use oat milk with 1 tbsp apple cider vinegar instead of buttermilk
- Replace butter with coconut oil
- Ripe banana in the batter adds natural sweetness and binding
How to Store and Meal Prep Pancakes
- Fridge: Stack cooled pancakes with parchment between each one, airtight container, up to 4 days. Reheat in toaster for 90 seconds, better texture than microwave, crisps the outside slightly.
- Freezer: Freeze in a single layer first, then stack with parchment between each pancake in a zip-lock bag, up to 3 months. Pull out individual pancakes and toast from frozen in 2 minutes. Genuinely one of the best freezer breakfast moves you can make.
- Meal prep move: Make a double batch Sunday. Freeze in stacks of 3, one serving each. Weekday breakfast goes from 15 minutes to 2 minutes without any quality compromise.
- Batter storage: Refrigerate batter up to 24 hours, it thickens overnight, add a splash of buttermilk to loosen before cooking. The rest time actually improves flavor.
When you’re building the full brunch spread, these pancakes, our Avocado Egg Toast With Pickled Onions & Feta for the savory side, and our Frozen Strawberry Yogurt Clusters as the cold sweet finish. Full brunch table, zero stress, all homemade.