Crispy Air Fryer Honey Garlic Chicken: The Perfect 20-Minute Dinner
I used to order honey garlic chicken from the same place every Friday. Same box, same sauce, same regret about spending $24 on something I could have made better at home.
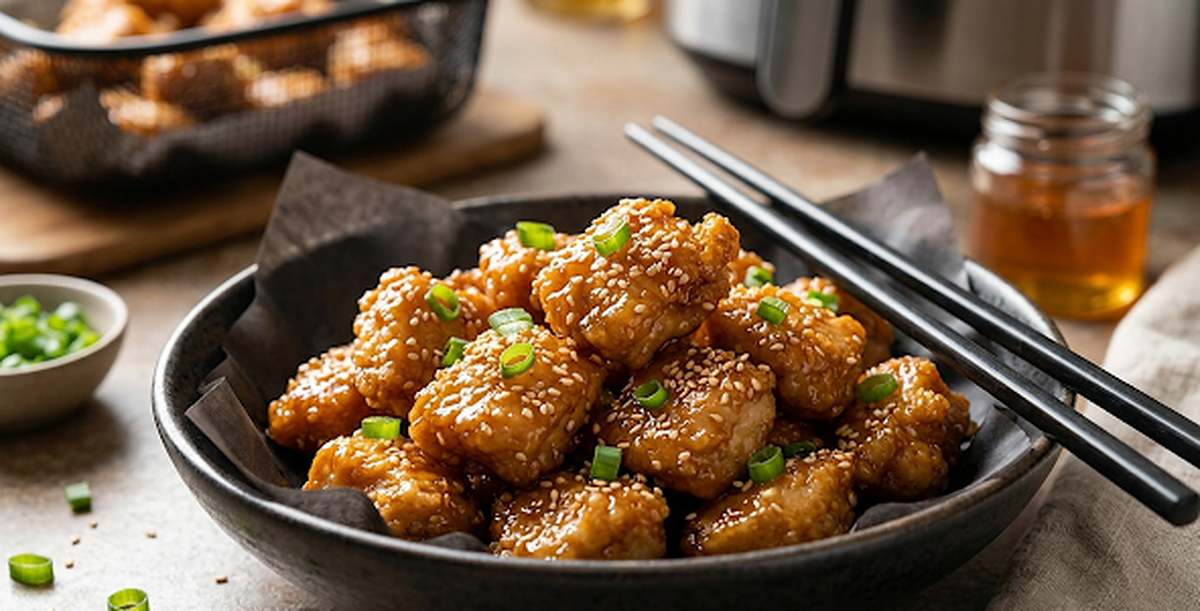
Then I figured out the air fryer version. Crispy air fryer honey garlic chicken comes out with a caramelized, sticky glaze on the outside and juicy, tender meat inside, in exactly 20 minutes. No deep fryer, no oil splatter all over the stove, no waiting 45 minutes for delivery.
Air fryer honey garlic chicken needs 20 minutes, 8 pantry ingredients, and one bowl to mix the sauce. Cook at 380°F for 18–20 minutes, flip halfway, glaze in the last 3 minutes. That’s the whole method.
So let’s retire the takeout order.
Thighs, Cornstarch and a Late Glaze
Chicken thighs over breasts: Thighs have more fat, which means they stay juicy at the high temps an air fryer runs. Breasts dry out fast, they’re less forgiving, and the margin between perfectly cooked and chalky is about 2 minutes. I use thighs every single time. Boneless, skinless for this recipe, they cook evenly and the glaze coats them properly.
Honey, raw or regular: Regular honey works perfectly. Raw honey has a slightly more complex floral flavor that comes through in the finished glaze. Either works, but don’t substitute maple syrup 1:1 here, it’s thinner and the glaze won’t reduce the same way.
Soy sauce: The salt, umami backbone of the entire sauce. It also helps the glaze caramelize in the air fryer, the sugars in the honey combine with the proteins in the soy sauce during the Maillard reaction to create that deep, sticky lacquer. Use low-sodium if you’re watching salt, the flavor is identical, just less sharp.
Fresh garlic over garlic powder: This is one recipe where fresh garlic wins. It gets slightly caramelized and sticky in the glaze rather than just seasoning the meat. Mince it fine, large chunks burn before the chicken is done.
Cornstarch on the chicken: Toss the chicken in a light cornstarch coat before seasoning. It creates a thin, crispy exterior that gives the glaze something to cling to. Skip it and the sauce slides right off. The crunch underneath the glaze is what makes this different from every other honey garlic recipe.
Secret weapon, rice vinegar in the sauce: Just one teaspoon. It cuts through the sweetness of the honey and adds a subtle brightness that stops the glaze from tasting one-dimensional. Most recipes don’t include it. Most recipes are missing something and don’t know why.
Air Fryer Honey Garlic Chicken
Ingredients
Method
- Preheat air fryer to 380°F for 3 minutes. A cold basket means uneven cooking from the start.
- Pat chicken thighs completely dry with paper towels. Dry chicken = crispy exterior. This step matters more than people think.
- Toss chicken with cornstarch, salt, pepper, smoked paprika, and olive oil in a large bowl until every piece is evenly coated.
- Place in the air fryer basket in a single layer, no overlapping, no stacking. Hot air needs to circulate around every piece.
- Cook at 380°F for 8–9 minutes, then flip each piece. Cook another 8 minutes.
- While chicken cooks, combine honey, soy sauce, minced garlic, rice vinegar, sesame oil, and red pepper flakes in a small saucepan over medium heat. Stir until it starts to bubble gently, about 2 minutes. Add the cornstarch slurry and stir for 1 minute until the glaze thickens and coats a spoon.
- Brush glaze generously over each piece. Increase air fryer to 400°F and cook a final 3 minutes, the glaze caramelizes, darkens slightly, and becomes sticky and lacquered. Watch it, it goes from perfect to burnt quickly at this stage.
- Pull out, rest for 2 minutes, the glaze sets slightly as it cools.
- Plate over steamed rice, scatter sesame seeds and green onions, squeeze of lemon or lime over the top.
Notes
- Chicken breast instead of thighs: Cut breasts into 1-inch pieces and start checking at 12 minutes total. Breast has less fat, so it dries out faster; pull it at 165°F (74°C).
- Gluten-free: Use tamari or coconut aminos in place of soy sauce. Cornstarch is already gluten-free.
- Glaze too thin or too thick: If it runs off the chicken, simmer it 1 more minute. If it turns gluey, loosen it with 1 tsp of water.
- Air fryer sizes vary: Basket-style fryers under 4 quarts should cook this in two batches; stacked pieces steam and never crisp.
- Storage: Keep leftovers in an airtight container in the fridge for up to 4 days. Reheat at 370°F for 4 to 5 minutes rather than in the microwave, which softens the crust.
Air fryer honey garlic chicken is ready in 20 minutes at 380°F with a sticky, caramelized glaze — no deep fryer and no $24, 45-minute delivery wait.
| Feature | Air Fryer Honey Garlic Chicken | Takeout |
|---|---|---|
| Time | 20 minutes | ~45 min delivery |
| Cost | Pantry ingredients | ~$24 an order |
| Oil | No deep fryer | Deep-fried |
| Control | Your glaze, your heat | Fixed |
Getting the Crust Right
- Don’t skip the preheat. I know it feels like an unnecessary extra step. It isn’t. A preheated basket gives you immediate high-heat contact the second the chicken goes in, that’s what starts the crust forming right away instead of the chicken steaming in its own moisture for the first few minutes.
- I personally found that letting the cornstarch-coated chicken sit for 5 minutes before it goes in the air fryer gives a noticeably crispier result. The cornstarch absorbs any residual surface moisture in that time, which means a drier surface hitting hot air, better crust, every time.
- Make extra glaze and keep it in the fridge. It lasts 5 days sealed and works as a stir-fry sauce, a dipping sauce, a grain bowl drizzle, or a marinade for literally anything. I make double every single time.
- Don’t open the air fryer constantly to check, every time you open the basket you drop the internal temperature and extend the cook time. Flip once at the halfway mark, glaze at the end, resist the urge to peek in between.
What the Cornstarch Is Doing
Why the cornstarch crust + glaze combination works: Cornstarch creates a thin, rigid surface coating on the chicken when it hits high heat, a crust that’s porous enough to allow steam to escape but strong enough to stay crispy. When the honey garlic glaze hits that porous surface, it gets absorbed slightly into the crust rather than sitting on top, which is what creates that deeply lacquered, caramelized coating instead of a wet, sliding sauce. It’s not just a trick. It’s chemistry.
Air fryer basket tip: After a sticky glaze recipe like this, soak the basket in warm soapy water for 10 minutes immediately after use, don’t let the caramelized honey set on the coating. Caramelized sugar bonds to non-stick surfaces fast and is genuinely difficult to remove once it cools. Ten minutes of soaking versus twenty minutes of scrubbing. Easy choice.
Burnt Glaze, Soft Coating and Other Fixes
“The glaze burned and turned bitter” → Glazed too early or cooked the glaze stage too long → Glaze only in the last 3 minutes, at 400°F, and watch it. The difference between caramelized and burnt is about 90 seconds at that temperature. Set a timer.
“The chicken wasn’t crispy underneath the glaze” → Skipped the cornstarch coat, or chicken was wet when it went in → Pat completely dry, toss in cornstarch before seasoning, and let it sit 5 minutes before cooking. The crust forms before the glaze goes on, not after.
“The inside was undercooked even though the outside looked done” → Air fryer temperature was too high and the outside cooked faster than the inside → Don’t exceed 380°F for the main cook, the final 3-minute glaze stage at 400°F is the only time you go higher. Use a thermometer. 165°F internal, no guessing.
Gluten-Free and Spicier Versions
- Gluten-free: Swap soy sauce for tamari or coconut aminos, identical flavor profile, no gluten, no other changes needed
- Spicier version: Double the red pepper flakes and add ½ tsp gochujang to the glaze, it adds a deep, fermented heat that’s completely different from just adding more chili
- Lower sugar: Reduce honey to 2 tbsp and add an extra tsp of rice vinegar, the glaze is slightly less sticky but still coats well and tastes more savory than sweet
- Creative twist: Add 1 tbsp of orange juice to the glaze for a honey garlic orange version, the citrus brightens everything and makes the whole dish smell incredible while it cooks. Or finish with a drizzle of chili oil right before serving for a sweet-heat finish that takes it somewhere completely different
For a sweet-heat version, skip the glaze and finish the chicken with 3-ingredient hot honey instead. It takes five minutes to make, needs no refrigeration, and keeps in the cupboard for months.
Leftovers and Reheating
- Fridge: Airtight container for up to 4 days. The glaze keeps the chicken moist, it actually reheats better than most chicken recipes because the sticky coating protects the meat from drying out.
- Reheat: Air fryer at 350°F for 3–4 minutes, the glaze re-caramelizes slightly and the chicken crisps back up like it was just made. Microwave works but you lose the texture. If you must, do 60-second intervals on medium power with a damp paper towel over the top.
- Freezer: Freeze in a single layer on parchment first, then transfer to a zip-lock bag, keeps up to 3 months. Reheat from frozen in the air fryer at 350°F for 8–10 minutes. Still good. Not quite as crispy as fresh, but absolutely acceptable for a weeknight.
- Meal prep move: Cook a double batch Sunday, slice over grain bowls or rice throughout the week. One cook, four different lunches.
When you’re building the full dinner, this chicken, our 5-Minute Air Fryer Lemon Herb Asparagus on the side, our Crispy Air Fryer Zucchini Fries as the base, and our Chocolate Peanut Butter Cheesecake Bars for dessert. Friday night dinner, handled. No delivery fees, no waiting, no regrets.